Thanks so much grace and anne for sharing my place and cardboard stampede today and hello to anyone visiting for the first time. I’ll post some more pictures from the sneak peek and the cardboard stampede diy a little later.
Category: how to
my friend
Judah is three and he’s smart and funny and already good at paper mache. He’s fun to make things with and for; this was for him and so was this. Next I’m going to make him some version of a beanbag toss game I found in a McCall’s Needlework and Crafts magazine from 1970. You lay it on the floor and try to toss the frog to the lillipad, fish in the water, the bird in the nest and the ladybug on the leaves.
I’ve posted the pattern and instructions here .
acorn how to
There have been questions on the particulars of yarn/glue acorn making so here are a couple of tips based on my recent experience:
Wrap the entire balloon with one layer of yarn. For the first layer I thinned the Elmer’s with a little water and painted it onto the balloon, and then the yarn, soaking it completely through. Let that dry over night ( this is by far the hardest part for me).
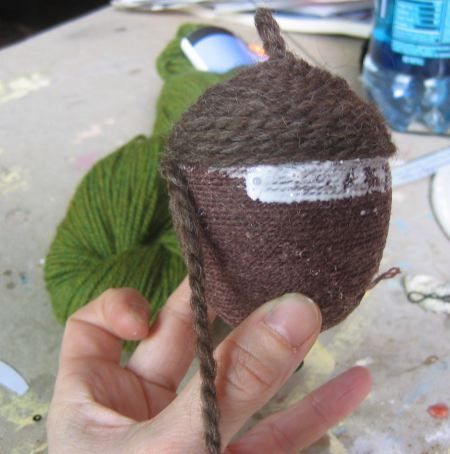
For the second layer, balloon still in tact, use the glue full strength, painting it on in small sections and pressing the yarn in so the surface stays glue free and pretty. I used a thicker yarn for the cap and green yarn for the bottom. The second layer took most of the day to dry (agony, again, for me).
Here’s the second layer in progress. It’s important that the balloon is still inside because the first layer softens again.
Pop the balloon, separate the sections with an exacto knife, and though it was sturdier than expected I reinforced the inside bottom, top and hinge point with a little wool felt.


