Tag: craft pattern

make a paper boat : a free tutorial

*This post contains an affiliate link

paper boat template image

Some projects are most satisfying to work on in batches. These paper boats are like that. They are quick and easy and you can make a bunch at once without much extra effort. Plus the finished group is very satisfying.  You probably already have most of the materials you need and you could easily be hanging a respectable fleet by the end of the day, who doesn’t want that?

download the boat template


you will also need:

  • heavy paper (I’m using water color paper) or light cardboard (like poster board)
  • a bamboo skewer
  • paper for the sail
  • elmer’s glue
  • gluestick
  • embroidery thread or light string (like baker’s twine)
  • buttons
  • paints, brushes  and/or collage materials
  • exacto knife
  • clothespins or paperclips for clamping

*Please read through all the steps before beginning.

*Also note I included some simple directions on the sail template for your convenience  but the directions below include more details and options.

1.  Cut out the boat and mast support templates and trace them onto light cardboard or a heavy weight paper. I’m Using water color paper (140 pound hot press is my favorite). Optional – paint both sides. I almost always paint a wash of water color on both sides of the boat and mast support.

2. Place the template back on the boat and poke your pencil through where the score lines intersect. Mark with a dot. Remove the template and draw on the score lines. Draw the score lines on the mast support too and mark an X on the center of the top section.

3. Use the back of an x-acto knife to score the lines on the boat and  mast support.

4. Gently fold the boat and mast support at the score lines.

5. Add glue to the last section of the mast support, fold it into a triangle and glue the top section over it.

6. Clamp with paper clip or clothespins while it dries.

make a paper boat

7. While your mast support dries paint or collage or draw on your boat. I did all three. I used a wash of watercolor, some pencil lines and a little collage. If you’re doing lots of collage I recommend using nori paste instead of blue stick . It is awesome. You can find it here. * FYI – this is an affiliate link – meaning I get a small commission if you purchase through the link.

8. Apply glue to the bow as indicated on the template.

9. Fold the boat together at the front and clamp with clothespins or paper clips while the glue dries.  Alternatively – you can skip the glue, bring the front sides together and stitch on the sewing machine close to the edge.

how to make a paper ship

10. Fold the center back ( A on the template) and apply glue to the top.

11. Bend up tab B – covering the top of tab A and matching the top edges. Apply glue and bend up tab C covering the top of tab B and matching the top edges. Clamp and let dry. Alternatively – skip the glue and attach the three layers with a stitch and a button (step 16 below).

easy paper boat project

Read More

easy doll clothes patterns and a free mini straw hat diy

easy doll clothes

A tiny summer top! Who would  have guessed she’d reveal even a hint of midriff. But there it is. Scandalous. You just never know about someone…

easy doll dress, top and hat sewing patterns

A new sewing pattern! And a free tutorial too!

Use your scraps to make adorable dresses and tops for your tiny ladies. She can wear the dress frontwards or backwards for a variety of looks (it would also make a sweet nightgown made from eyelet or a vintage handkerchief).

easy doll clothes sewing patterns

The dress, top and hat are quick and easy to make. I spent a ton of time working out a tiny dress pattern that does not require lots of  hems and has no fasteners. You could use the simple technique to create all sorts of little garments. They are just the right size for the tiny rag doll and the pattern scales well for other rag dolls.

easy doll clothes sewing patterns

easy doll dress sewing pattern

The tiny rag doll needed a summer wardrobe.  She is headed for the French countryside soon so a big sun hat was a must.  The hat is included in the pdf and I’ve shared it below too.

easy doll dress pattern

get the pattern

make a mini straw hat:

free min straw hat diy

A couple material notes – I used cheese cloth – it’s cheap and easy to find. You can also experiment with any very light weight, gauzy, open weave cotton or linen fabric for different effects.

The nail polish bottle is used for forming the hat crown – any similar glass or plastic container can be used. The bottle I’m using made a hat that’s just the right size for the tiny rag doll – it is 5/8th inches across.

I’m using elmer’s glue

Paint – I used acrylic craft paint – mixing shades of brown, ochre and white for a straw shade.

I finished the hat with a mini silk ribbon. I love these ribbons and you can find them here. They are great for lots of tiny details and embroidery too (fyi – the miss thistle society gets a small commission if you purchase through the link).

mini straw hat making suplies

1. Cut a piece of cheesecloth about 5 inches by 5 inches. Cheese cloth has 4 layers and we will use them all.

2. Mix a straw shade of paint and add white glue (about 4 parts glue to 1 part paint). Paint the top 1/4 inch of the cap. Optional – I’m mixing glue into the paint but if you prefer you can just use glue and paint later or leave unpainted.

3. Center the cheesecloth over the cap and pull it tightly over it.

4. Hold the cheesecloth tight with an elastic.  Paint a thin layer of glue or the glue paint mixture on the cheesecloth. Let this dry completely.

5. Remove the rubber band and remove the cheesecloth from the bottle and spread it flat on wax paper.

6. Paint the cheese cloth with a thin coat glue or the glue mixture a little wider than you would like the brim. Brush firmly out from the center. Let this dry completely.

7. When it’s dry lift it off the wax paper.

8. Trim the brim to whatever size you like.

free straw doll hat diy

To finish you can add ribbon or a mini flower or stitch a detail on the brim or crown with embroidery thread. I used 4mm silk ribbon (affiliate link – meaning the miss thistle gets a tiny commission if you purchase through this link).

doll hat diy

I hope you make tiny hats! share your photos with the tiny rag doll community by using  #annwoodpattern and #missthistlesociety on instagram.

mini straw hat diy

make a quick and easy mini quilt from scraps

easy doll quilt tutorial

miniature quilts made from scraps

Make a whole stack of them, they’re just the right size for the clothespin doll bed and super quick and fun to make.

easy doll quilt tutorial

These little quilts are the sort I imagine the Sock’s family has mountains of in their big black house in Woebegone Pines. Haphazard, make-do sorts of things, accidentally charming pieced together leftovers, all thread bare from keeping generations of mischievous Socks offspring cozy.

miniature doll quilts

To make your little quilt print the template and gather cotton scraps. Start freestyle piecing them together.

The template makes a doll quilt that is 6 and 1/2 inches X 7 and 1/2 inches. Exactly the right size for the clothespin bed.

You can stitch by hand or machine (I like to use the machine for this). When you’ve got something bigger than the template pin the patchwork to a backing fabric with the right sides together and cut out. Save the patchwork scraps after cutting – you can stitch those together too. You can add a layer of lightweight cotton flannel inside if you like. I prefer the way the quilt drapes without it.

doll quilt diy

Tip: If you are making a few quilts make one big piece of patchwork and cut them all out. It goes quickly and I think it makes the most interesting compositions.

doll house size quilt tutorial
Stitch the patchwork and backing together. Leave a little opening at one end for turning and clip off the corners.

doll quilt diy


Turn it right side out and use a chopstick to poke out the corners. Press it and whipstitch the opening. You can quilt through it or not. I mostly went with not but did add some sweet red ties to one quilt.

To make the quilt drape nicely over the bed  arrange it and then press it on the bed with a hot iron along the curves and folds.

doll house bed and quiltmr. socks doll in pajamas

It’s all ready for mr. socks. I made him pajamas too (using the free little pants pattern) for an even cozier situation but he refused to wear them. You know how mr. socks is…

mr. socks in a sweet doll bed
the somewhat weekly newsletter

Do you get my free weekly-ish newsletter? There are tips and tricks, ideas, stuff to try, all the latest news and blogposts and extra stuff, just for subscribers, delivered mostly on Friday. Pretty much.


doll quilt from scraps free tutorial

doll house bed tutorial – part 2 : making the mattress

doll mattress sewing tutorial

free doll mattress tutorial

This tufted doll mattress and pillow fit the clothespin dollhouse bed perfectly. It’s quick and easy to make and perfect for the tiny rag doll.

how to make a tufted doll mattress

You will need:

doll mattress sewing tutorial

1

1. Cut out the mattress from cotton fabric, pin with right sides together and stitch as shown.

2.  Pull the fabric sides apart at the corners

3. Open the seam allowance with your fingers and press the seams together. Stitch across at 1/4 inch. Do this for all 4 corners.

doll mattress sewing tutorial

4

4. With all four corners sewn the mattress should look like this.

Read More

how to make a doll house bed from clothespins – part one

doll house bed tutorial

make a doll house wood bed

Do you know somebody very little who needs a bed? A tiny rag doll perhaps? I’ve made you a tutorial for a sweet wooden dollhouse size bed made from clothespins and craft sticks. It is perhaps my greatest gift to humanity. Also, I had an unbelievably good time figuring it out and making it. So obsessed…

It is the latest Miss Thistle Society project, the quest to fully outfit the tiny rag doll’s world. Of course she needs a super cozy bed. The epic instructions for the bed are below and find the instructions for an easy tufted doll mattress here.

I hope you make sweet little beds! Tag your posts on instragram with #annwoodpattern and #missthistlesociety.

how to make a doll house bed from clothespins

note : It is very helpful to read through the directions completely before beginning.

doll bed from clothespins materials

*This post contains affiliate links – if you purchase supplies through some of these links The Miss Thistle Society gets a small commission.

Materials:

  • 6 clip clothespins and a few extra for clamping – I’m using these.
  • 11 jumbo craft sticks – The sticks are 6 inches by 3/4 inch – available in most craft stores or you can find them here.
  • small bamboo skewers – 1 or 2 depending on the length – I’m using these.
  • paint

Tools

  • wood glue
  • wax paper
  • scissors
  • wire cutter
  • ruler
  • exacto knife
  • paintbrushes
  • OPTIONAL – spackle, sandpaper

doll house bed diy - parts

Cut:

  • 8 – 3 and 3/4 inch craft sticks
  • 2 – 4 and 3/4 inch craft sticks
  • 2 – 4 and 1/2 inch bamboo skewers
  • 6 – split clip clothespins
  • And 1 whole craft stick

Separate the clothes pins by twisting. I used old but sturdy scissors to cut the craft sticks and wire cutters to snip the skewers.

cut parts for doll bed tutorial

Accurate measuring is very important to all of this fitting together.  And cut your craft sticks as straight as you can.

1. Make a mark on one side of 4 clothespin halves 1/8th inch from the notch on the flatside.

2. Apply wood glue to the end of one of the 3 and 3/4 inch craft stick pieces.

doll bed how to step 3

3

3. Working with wax paper underneath press the craft stick against the clothespin -as shown-  at the mark. The stick should be at a right angle to the clothespin.

doll bed diy

4

4. Repeat the previous step so you have two glued sets. Let these dry undisturbed on the wax paper until thoroughly set.

doll bed diy

5

5. Make 2 more sets and add a second stick to each. Add the second stick next to the first – closer to the tapered end of the clothespin. Let these dry as well. You should now have 4 glued sets of sticks and clothespin halves.

dollhouse bed tutorial

6.

6. You can use a ruler to check that your sticks are at a right angle to the clothespin.

7. When the glue is dry gently peel your pieces from the wax paper. Begin with the single stick pieces. They will be fragile so handle them gently. You will also need 2 more clothespin halves and one of your 4 and 1/2 inch skewers.

8. Flip one clothespin and stick set over so the flat side of the clothespin with the notch is facing you. Apply glue to one end of a the skewer.

Read More

little doll pants : a free sewing pattern

doll pants hand sewing project

The little pants are very, very easy and quick and could be resized to fit all sorts of dolls. It’s a fun hand sewing project or if you like you can sew them on the machine.  In case you want to make one million pairs of tiny pants.

doll clothes diy - pants

He looks so happy! Happy to be getting pants. Little pants, just for him. It’s time to make the lambs and get pants on them. I’ve made you a simple pattern for little pants. The lamb is made from the mr. socks sewing pattern with these modifications. Mr. socks could wear pants too if he felt like it (you know how cats are…) but you would need to leave an opening in the back seam to accommodate his tail.

doll pants sewing pattern

free doll pants sewing pattern

doll pants sewing pattern

Click here to download the template.

You will also need – cotton, a basic hand sewing kit, embroidery thread and needle and a little button.

doll pants diy

Cut 2 pants pieces, cut the top and bottom edges with pinking shears. Mark the seam lines lightly on one piece, pin right sides together and sew just the curved seams.

doll pants tutorial

Open the pants so the curved seams you just sewed are in the center. Pin the legs together and sew the straight leg seams.Trim the leg seam allowance with pinking shears.

doll clothes sewing tutorial

Fold the top edge over about 1/4 inch (try the pants on your doll for a perfect fit). Stitch the folded over top with small neat stitches. Fold up the leg bottoms and hem.

doll pants sewing tutorial

Add a draw string of embroidery thread – stitch through the top folded edge – leave the ends hanging. Add a button in the center. Pull the strings to gather and wind around the button clockwise to hold. You’ve got little pants!

doll clothes hand sewing project

Wearing pants and feeling good about it.

lamb in pants

Add the free felt jacket and free felt hat patterns (larger sizes for both) and you have a fully outfitted lamb!

Do you get my free weekly-ish newsletter? When you subscribe you can download the deluxe pants template with instructions.

floating ship in the pines, frida, a blue girl: lovely things made by customers

lovely things made from ann wood handmade patterns by customers

 I love seeing what you make with ann wood patterns, the details you invent, the stories you create and share. 

made from ann wood patterns

This enchanted paper mache ship is by Tierney Barden. I love it, the image makes me think of Narnia. And More gorgeous ships by  floratwigg and Sharon.


The bed and blue doll are by Melanie. She is creating a whole  world for that mysterious blue tiny doll.

From Melanie: “making this, I thought my heart was going to explode!! “


I so get that feeling and I  love everything about this, the joy in creating it is unmistakable and beautiful.  I’m looking forward to more of that blue doll’s tiny world. Also be sure to checkout her needle book, the brilliance of it can not be contained in a photo – the little book is filled with ideas, imagination and inspiration. Check out this video.

Find the tiny doll pattern here, and the hearth tutorial here.

Darling miniature china made by Carolyn using this paper clay  tutorial.

made with ann wood doll pattern with modifications

Bunnies and laundry!! Created by Rachel. The bodies and clothes are the tiny rag doll pattern and the bunny heads are her own.

And tiny rag doll has had a baby!! The dolls below are also by Rachel.  She used the doll and wardrobe patterns as well as the tiny hat tutorial. That baby is all her. Such beautiful work.

And more dolls with sweet details added – a little lady by @onbaycreek and a birdwatching boy by annette.

mushroom sewing pattern

Perfect little toadstools by Randeen  and Stella and Summer – made from the little mushroom pattern.

owl dewing pattern

Dastardly owls by Erin, Wendy and Joyce.

bird sewing pattern

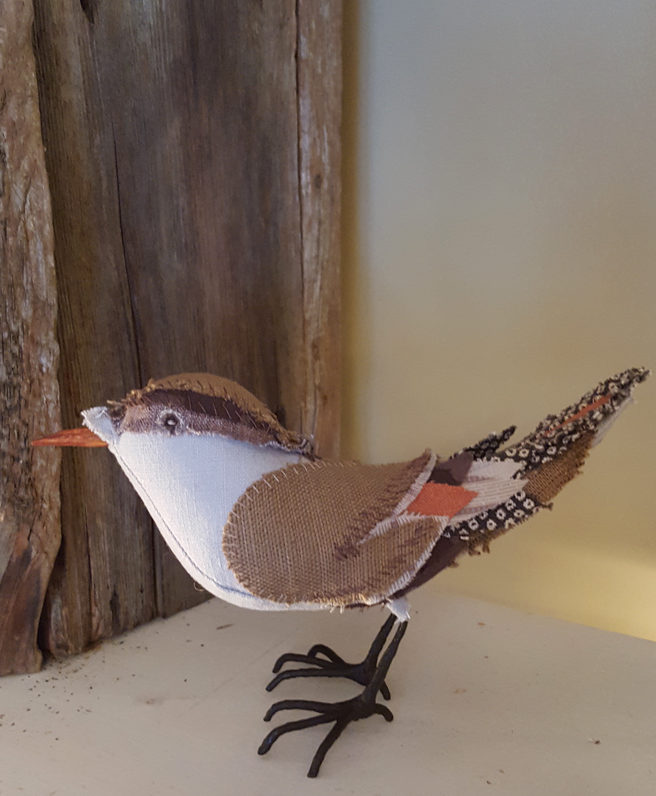
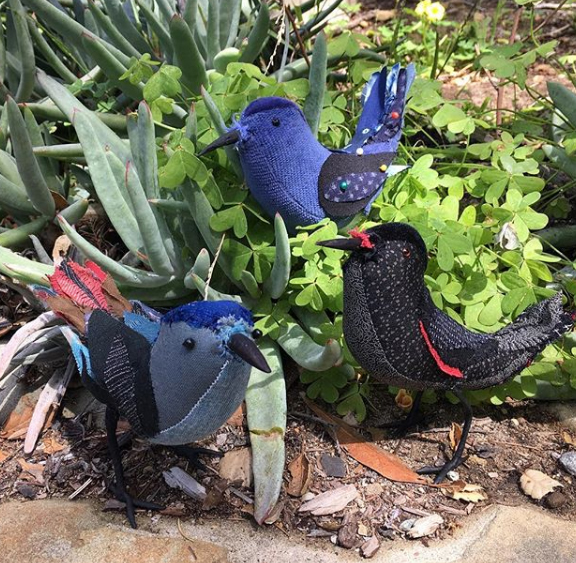
Gorgeous birds by Suzanne and Yvonne and Deb.

Super sweet and pink! wooly squirrel by Beth  (forest folk pattern).

Hello little pirate! These are all made from the free very nice mice pattern the pirate is by Beth, the little gray mouse is by Bushra and the bunnies are made by Elizabeth – she added the long ears and fluffy tails to the mouse body.

There were so many photos of wonderful creatures and dolls it was overwhelming and difficult to choose. Please checkout  #annwoodhandmade  and  #annwoodpattern  on instagram for more sweet creatures and dolls and marvelous ideas and imaginative details added by the makers.

miniature dish tutorial : make tiny teacups and plates

doll house dish tutorial

doll house dishes diy

The original plan was to not have handles. It felt impossible and Miss Thistle didn’t seem like a handle kind of doll anyway, what with the no fingers and all.  But once I figured out how to make a cup I had to have the handle. The handle quest was long but the solution is easy and makes a truly awesome tiny handle. Really, it is magic.

doll dishes diy

The little plates are simple too. In my first (and many) attempts I struggled with getting shapes and edges I liked. Lots and lots of failed tiny plates led me to an easy solution for that too.

revelations:

  • it’s easier to cut paper clay after it dries a little
  • octagons are much easier than circles
  • at this very moment your house is full of things that will stamp adorable patterns on tiny plates – soon you will be looking at the bottoms of everything…

miniature china tutorial

Before we talk about how to make the tiny dishes and cups let’s jump ahead to the finishing.  Paint your tiny cups and plates and saucers with acrylic paint. 

I vote for heart and sweetness over perfection in decorating your miniature china. The more I relaxed the more I liked what was turning up.


doll house dishes diy

*Some links are are affiliate links – meaning I get a tiny commission if you purchase through the link – they are marked with an astirisk *

You can thin the paint to make washes. The effect of painting it on and wiping it off is nice, so is splattering using a toothbrush.

For little details and lines I use this brush*.  It’s handy for lots of things.

And  optionally finish each with a coat of nail polish. Using one that is not quite clear  (mine has just a hint of shell pink) makes a  lovely surface.

doll house dishes diy

doll house ideas

doll house dishes diy

doll dish diy

how to make the teacup

You will need:

  • paper clay*
  • a sharpie marker (or a few)
  • white glue
  • embroidery thread (I used – dmc 8 pearl cotton*)
  • scissors
  • paintbrush
  • plastic pencil
  • a little cornstarch
  • sandpaper
  • tooth pick or skewer

tiny teacup diy

Double a length of embroidery thread  ( I used dmc 8 pearl cotton – you could experiment with other floss or twine as long as it is a natural fiber).  Saturate the doubled thread with glue (I used my fingers) and wind it around the end of the pencil as shown. Let this dry completely

miniature teacup diy

When the thread is dry remove it from the pencil and snip off a small section of one curl. Coat the end of the sharpie with a little bit of cornstarch (just a very light dusting – you don’t need much).

Read More

make a miniature stone hearth : the miss thistle society

making a miniature fire[lace form egg cartons

Penelope T. Littles

She has been speaking to me for a long time. Little whispers of her origins, her tidy house, her hearty ancestors.  This is what I know about Miss Thistle.

I’m sure she cooks on an open hearth and has a cozy spot by a window for sewing and correspondence and daydreams and tea.

Thistle P. Littles, Green Valley. Morning, Mountain Shadow

She tends a medium size garden and keeps chickens and goats and bees. And she has sweet miss-matched china – passed from aunts and grandmothers and friends.

My way into Miss Thistle’s world is the hearth. Your tiny rag doll might need a hearth too.

miniature stone hearth tutorial

It’s not hard to make. And before we dive into how I want to tell you about the next Miss Thistle Society project: her mismatched china. I have a trick that makes it pretty easy and spectacularly fun to make her tiny hand-me-down plates and cups. Look for that next week.

doll house plates

paper clayYou probably have most of the things you need for her dishes, except maybe the clay. I use paper clay – this is my brand and you can get it here  (The Miss Thistle Society gets a tiny commission if you purchase through this link).  I use it for lots of things but I always buy the small size because it does not store well after opening.

To make the hearth you will need:

  • paper egg cartons
  • light cardboard
  • elmer’s glue
  • mat board (or a thick cardboard (not corrugated)
  • exacto knife and scissors
  • masking tape
  • spackle (  Find it at any hardware store – I like Fast ‘n Final Lightweight Spackling)
  • craft paint
  • brushes – a variety of sizes
  • toothbrush
  • a sponge and a soft rag
  • fine sand paper

And you will need a hearth. A shape to work on.  I made my shape out of foam core and mat board. It’s assembled with hot glue mostly. So many burns…  And I made a giant hearth – you don’t need to. A small one is sweet and quick to make.

This tutorial is concerned with making the stone finish but I will offer a couple tips on making your foundation shape.

make the hearth opening

The easiest thing to do is start with a box (a sturdy corrugated box).  The box above is about 6 X 9 inches and 1 and 3/4 inch deep.  Mark the opening and use your exacto knife to cut all the way through the lines marked in red and score (just cut the surface of the cardboard) the lines marked white.  Fold back the sides to make the inside walls of the hearth.  Glue the hearth walls in place and cover the scored areas and edges with making tape.

If you make your own shaped foam core is great  – choose white or black.

Whether you build the shape or use a box, re-enforce  the corners (inside) with little triangles of mat board glued in. A few in each corner will make everything stable and sturdy.

I’m demonstrating the stone texture on my huge hearth. Cut shapes from grey cardboard and tear shapes from a grey paper egg carton (the flat parts) to create a little variety in texture and edges. Glue them to your structure with elmer’s glue.  I made my structure out of black so you could see but it does not matter – white grey or brown is fine.

cardboadr stone hearth

Cover the entire structure (I left a small section of my hearth un-stoned because I have a wood mantle I want to add). Let the stones dry in place.  Read More

10 ideas for your scraps

stitched amulets on my work table

stacks of antique fabric scraps

Did you know it is national scrap week? It is not. I made that up. But it should be a thing. I’m making it a thing.  A bag of scraps is food for thought, inspiration, an invitation to happenstance, possibility thinking. It always has been for me.  

I’m in organizing mode here and sorting through pretty much everything but mostly fabric scraps. Choosing what to keep, what to let go of and making what I keep as tidy and orderly as scraps can be. I’m ironing my scraps. I secretly love to iron. Not my clothes, I’m permanently, slightly, comfortably disheveled.  I like to iron scraps. It’s a little ridiculous. Lets call it meditative. Or it could also be called productive procrastination… 

tiny scrap of vintage fabric to patch tiny pants

And sometimes not so productive procrastination. It frequently devolves into spending a lot of time pondering a very small and fabulous scrap. I love this scrap. Now I have to make a tiny pair of pants so I can add this patch to them. And then I have to make a lamb to put in the pants. You see how this goes…

fragment of an antique garment

There are some pieces I can’t call scraps. Some are so exquisite I call them fragments. Something left over from a life with marks from other hands and days.  

10 ideas for your scraps

If you have found your way here it is likely you have scraps too. In celebration of the inaugural scrap festival I’ve collected 10 ideas for your scraps. Let’s start with 3 projects for your most special scraps, your fragments.  

1. sweet needle books –  for needles and ideas and memories.

2. amulets – little stitch experiments I  started making last summer. I begin with no shape in mind, just layering my favorite fragments, experimenting and playing with compositions. Then I trim them and sew a backing. I find the compositions are more interesting if I approach them this way rather than beginning with the shape. I made a little template of the shapes I use for you – you can download that here.  And for cord I usually use this waxed thread (PS I get a tiny commission if you buy it through that link, you can also find it in craft stores).

stitched amulets on my work table

3. ethereal garlands – for the tiniest scraps, the un-sewables, the little whispers you can’t let go of.

4. string quilts- there is a full tutorial here for this quick and easy flip and sew technique for your longish scraps.

5. Once you have pieced together a bunch of scraps you can make a fabric basket – you know what you could put in it?  Scraps.

specks and keeping stitched compostition

6. marvelous fabric compositions – let happenstance be your guide and find inspiration in these stitched pieces by Specks and Keepings. The left-overs from garment sewing are used as is. I love the compositions. There is magic in those accidental shapes and relationships. 

songbird sewing pattern

Check out the sewing pattern and supply shop!


7. french seam pillow cases – for your larger scraps. This is on my domestic sewing list. 

8. jar opener – so clever – made from fabric scraps and rubber shelf liner. 

9. fabric twine – for your tiny scraps. And netflix. And wine. 

10. And finally – it  is illegal to do a blog post about fabric scrap projects without including fabric bunting. Plus I love it – so sweet to make for little folks.

Find 4 more scrap project ideas here. And if you have a project to recommend please leave it in the comments.

 P S – Do you get my free weekly-ish newsletter? There are tips and tricks, ideas, stuff to try, all the latest news and blogposts and extra stuff, just for subscribers, delivered mostly on Friday. Pretty much.

ann wood : stitch expeiments and stacks of antique scraps

the world’s sweetest needle book : a free sewing pattern

heart needle book sewing pattern

free heart needle book tutorial

This little book will certainly hold your needles. It could also be a repository for the scraps you can’t part with. It could tell a story, mark an occasion, like a birth or anniversary, or be a sort of travel journal, the pages filled with little things found along the way and saved.

needle book and tiny rag doll night gown

I always travel with small sewing and it is always a mess of ziplock bags and other aesthetically unappealing containers with sharp things poking out of them. This started as a practical project and turned into a whole other thing.

I made this needle book for future me. Future me is the sort of person who is packed a week before travel, has extra light bulbs and never runs out of toilet paper.

needle book made from scraps

needle book ideas

I’m in love with my little needle book and plan to take it pretty much everywhere for the rest of my life. There are more of these books in my future, for needles and ideas and memories. It is good winter evening sewing.

needle book : free sewing pattern

pin it for later

I’ve put together a tutorial for you below. And subscribers will have a link to a pdf download emailed to them.

You will need a basic sewing kit and the templates.

download the templates

materials :

  • cotton or light linen 
  • scraps for details
  • matching and contrasting thread
  • button
  • embroidery thread
  • batting or felt
  • light weight cardboard
  • ribbon
  • gluestick

patch and appliques : needle book pages

Cut out two each of the A, B, C and heart pattern pieces. One side of A will be your cover page. Add patches, embroidery, appliqués, and other details to your pages. Also cut out 2 cardboard support pieces from light weight cardboard ( a cereal box is great). Use a glue stick to glue the cardboard to pieces of batting or felt and cut out.

Note: Piecing fabric together before cutting the pattern shapes creates a nice variety in the pages.

needle book : ribbon latch

Cut a 3 and 1/2 inch length of ribbon or trim and fold in half. With the right side of the cover fabric facing you pin the folded ribbon to the center of the left side. The folded edge should extend 1 and 1/4 inches from the seam line.  I’m using 1/4 inch cotton twill tape.

needle book_tutorial : seam lines

Pin The A, B, C and heart pieces with the right sides together and stitch the seam lines. Leave a small section on each open for turning. Be sure that the opening on A is large enough to insert the cardboard supports. Clip off the corners of the rectangles close to the seam. Clip the bottom point of the heart and clip notches around the curves at the top and at the center.

needle book tutorial : stitch pages

Turn your sewn and clipped pieces right side out. Use a chopstick or similar to push the corners and curves all the way out.  Add any additional appliqué or other details.

needle book tutorial : insert support

Insert the cardboard and batting pieces into the cover page. The batting side should be facing the inside and the cardboard facing the outside cover.  Push the cardboard all the way to each side, there should be an empty space between them. Leave the cover open at the bottom.

Read More

the songbird pattern booklet

bird pattern booklet and wool stuffing

bird sewing pattern bookletsongbird booklets are back in stock now

I need deadlines. For everything. Even stuff I love doing.

I knew that before but I thought of it as a shortcoming. A bad thing about me I need to change instead of acknowledging how I’m wired and working with that reality. Figure out what I need, identify what motivates me and arrange my life as optimally as possible to support that. Just like time, focus, energy and attention motivation needs to be managed.

There is nothing like a credible threat to get you moving.  The songbird booklet lingered in almost done for ages. The unmovable, fixed date of the Squam Art Fair was the perfect motivation to push the print pattern across the finish line. Get up a little earlier, work a little later, beg the printer (local and awesome). Make it happen. It was painful. And I’m so glad I did it.

bird pattern booklet and wool stuffing

I love the booklet, and I love that it is done. It is more than 20 pages and illustrated with over 100 black and white photos. Checkout some lovely birds made from the pattern below and if you like you can send images to me at info at ann wood handmade dot com or use #annwodpattern on instagram.

P S- By the way I’m thinking of offering wool stuffing in the shop this fall – what do you think?