Tag: craft pattern

stripes make a sailor and the easy way to make sails

gentleman sailor owl

stitching sails

When I first started making ships I was doing little handkerchief rolled hems on the sails. They were pretty but drove me crazy and took forever.  When I put together the paper mache ship pattern I wanted something easier and I found it.  It’s super simple and has other benefits too.

sail

I  cut two pieces of fabric for each sail (not usually the same fabric – I like the front and back  to be different  – even just subtly),  pin them right sides together and stitch around – leaving one little section open. Trim the excess off the corners,  turn it right side out,  press and stitch closed.  I add a whip or blanket stitch around the edge and  layers of patches and lace.  You can click here to download the sail pattern below if you’d like to give it a try.

sail_pattern_annwood_2

This method is much quicker than the tiny hems and makes a very tidy sail.  Also the double fabric helps the sails hold their shape when you fill them with wind.

paper mache ship

I’m making an owl to captain the ship I’m working on  and used my favorite piece of antique ticking for his front.  Putting a horizontal stripe on an owl transforms him instantly into a gentleman sailor.  The owl below is the medium size from the little owl pattern.

gentleman sailor owl

And ticking stripes are nice for sailing mice too.

sailor mouse

how to make my signature frothy lace cake topper bird gown

fancy bird gown tutorial

bird wedding gown

There are lots of cake topper birds on my worktable right now. It’s been 10 years since I made the first set  and I guess-timate that I’ve made more than two thousand pairs.  That’s a lot of dressed up birds. Today I’m going to show you how to make my frothy little gown for a cake topper bird or any other formal bird occasion.  The bird is made from my little bird sewing pattern but I think you could use the same technique on other birds – just adjust the size of the lace.  I think it’s helpful to read through all the steps before beginning and you can click the images for a larger view.  You will need a basic sewing kit and some lace scraps – something soft and not to stiff or heavy is best – I’m using cotton tulle.

bird gown 1         bird_gown_2

1. Cut a piece of lace or tulle – a rectangle that is 7 and 1/2 inches by 3 and 1/2 inches.

2. Place the lace on the bird so there is a long and a short side – you want one third on one side and two thirds on the other. Fold the raw edge under and pin the lace to the back seam of the bird neck.

bird gown 3        bird gown 4

3. Starting with the short side turn the raw edge under and pin into the seam at the side of the neck and then again – right on the seam – about half way down the from of the bird body.

4. Repeat on the longer side – pin once at the neck and then bring the lace across the body – folding the raw edge under  and meeting the pin on the other side – use that pin to hold both sides in place.

bird gown 5        bird gown 6

5. Begin stitching the gown to the body where the sides meet – make a couple tiny stitches here and knot once – keep the thread attached.

6. Using tiny whip stitches stitch all the way around the neck twice. It’s important to go around twice to make sure the neckline stays in place.

bird gown 7        bird gown 8

7. Pin the short side of the lace back out of your way and pull the long side around the body. To make the fancy ruched front gather the top 3/4 of an inch or so with your fingers into little folds – pin in place with one or two pins and sew the folds in place along the seam ( these stitches won’t show).

8.  Use your finger to pull the long side of the lace around the body ( you may need to take out the pin holding the short side) and stitch the rest of the  lace to the seam, stitching towards the tail – again these stitches will not show.

bird gown 9        bird gown 10

9. Stop stitching where the body meets the tail and trim the lace – just leaving a small edge. Stop trimming about one half inch below top (where the little folds are) and leave a long piece of lace. (save your little scraps – we’ll use them later).

10. Pin the long piece you left out of the way and pull the short side of lace across the body. While holding the lace across the body stitch in the same place as the previous side, right on top.  Read More

sailboats : a new sewing pattern and a sample sale

sailboat sewing pattern

The Sailboat pattern is here! Charming boats to sew. They twirl in the breeze and cast lovely shadows. The boats are a great way to use fabrics that are special to you – make a little memory vessel – there is lots of opportunity to personalize and embellish and create an heirloom. I also love to make them from old quilt tops that I pick up at fleamarkets and sometimes on Ebay. The pattern is in the shop now.

I hope you make sailboats!

sailboat sewing pattern

handmade sailboat and pirate

patchwork sailboat


french hens

handmade hens

handmade blue hen

Suddenly a chicken appeared! Or more specifically  a hen, a french hen. It occurred to me that maybe the merry wobbler sewing pattern could be modified to make a hen – and it can!  Of course they need nesting boxes too and I created a little template and tutorial on how to make the box and modify the wobbler. Both are super simple – find the template and instructions below after lots of hen pictures –  I couldn’t help it  – I love them.

handmade hens

handmade french hens

hen house

blue and white hen

french hen posteriors

You can download the template for the nest box and hen parts here.  

bird sewing pattern


And you will also need the merry wobbler sewing pattern or, if you like, come up with your own bird to chickenize.

Other supplies are:  felt for hen parts and the nest, a glue stick, cardboard  and embroidery thread- I’m using dmc 8.

nest box 1

Beginning with the nest box – cut out 2 of the felt shapes for the nest and one cardboard bottom – cereal box weight cardboard.  Read More

progress on the little fabric boat pattern : removing the nuts

little boat work

little boat work One of the many unexpected benefits of designing craft and sewing patterns is that I end up questioning why I do things the way I do and pushing for better, clearer, simpler and cleaner solutions. The exercise of explaining a process to someone else, breaking it down into steps, highlights all sorts of imperfections, inefficiencies and details that complicate and don’t enhance significantly.

merry wobbler

The little fabric boats had a detail like that – a detail I was very attached to, a detail that was difficult and time consuming to execute with consistency. I love these little boats and I’ve made tons of them over the years – it was nutty of me to put up with that sticky point for as long as I did.

fabric boat detail

The boats originally had a curve in the back – you can see it on the green boat above.  I experimented with a bunch of adjustments to try to make it easier but nothing worked. As much as I liked that curve the difficulty did seem unreasonable. These boats are so sweet and fun, perfect unexpected presents and lovely as a group so I am determined that they be easy to make. And now they are. In the end I tried a simpler piece for the back you can see on the brown boat – no bend or curve. I ended up liking the simple shape better – much better. The more complicated back was nice and clever but didn’t REALLY add any charm to the design after all – I was just attached to it.

pirate wobbler

Look for the pattern in about a week – just in time for a spring regatta. And there will be a sample sale too – I’ve made a bunch of these little boats while working it all out. If you’d like to be notified by email when the pattern and boats are in the shop you can sign up here.

cloth, a podcast interview and spheres – a free template to experiment with

indgo sri toadstool

I love cloth.
I always have – as a child it was something I had in abundance and I learned to think well in stitches. I especially love old cloth. Lovely old cloth. I love it for it’s simplicity, it’s commonness, it’s possibilities and meaning.
sri threads :old cloth

I spend happy hours considering and choosing – today I’m gathering bits of indigo for an owl. I love the textures and patinas that comes from decades or centuries of life and use and I make things that celebrate it as I find it – all it’s scars and mending apparent. And I add my own patches and mends and visible stitching – I love the sewness, the make believe. The fragility and other unexpected qualities of very old cloth send me in new directions, new ways of doing things. I used some of my most treasured scraps from Sri Threads to make these toadstools.

sri toadstools

indgo sri toadstool

I love the little guy. You can find all three in the shop today.

As I was working on them I was thinking about constructing shapes in cloth and what a fascinating process that is. If you’re experimenting with that kind of sewing, especially if you’re just beginning to play with three dimensional sewing – spheres are a great place to start. When I teach a workshop I almost always give away a pattern for three and four part spheres. You can download that pattern here if you like.

And speaking of patterns – more are coming soon – fabric boats, tiny dolls and the flamingo kit. I’ve hit a lot of snags and complications putting that together, it’s been a bigger mountain to climb than I expected but it’s almost there.

And in other news:

A new podcast interview! My second ever. Find my conversation with my good friend Elizabeth Duvivier (founder and director of Squam Art Retreats) here. I loved our chat – Elizabeth is a smart cookie, a truly curious person and I love her new podacast. Two of my favorite episodes are with Suzan Mischer and Kerry Lemon. I hope you check it out.

houses for mouses

mouse house party

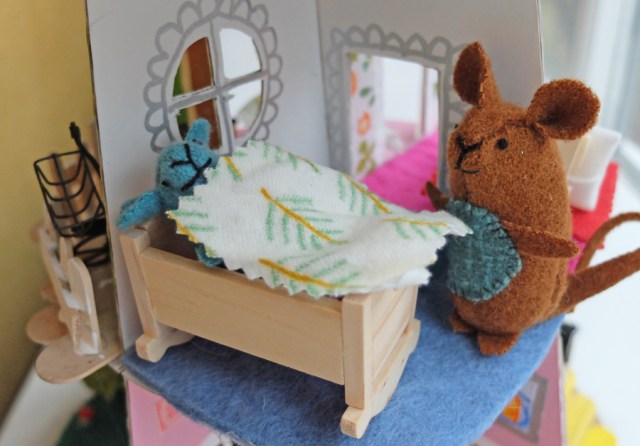
So many nice mice! I love seeing what you make.  Check out the fantastic mouses and houses!! by readers below – I love them – every little detail.   This multi level affair is by Maura for her son – I can’t stop looking at it.

mousehouse_maura

mouse house

mousehouse_maura_2

mouse house

mousehouse_maura_3

And A little house in a box by Mama with a Needle and Thread for her little girl – so freakin sweet. Good night little mouse!

mouse house

mama_baby_mouse

Susan added little wooden bases to her dinner place card mice – it’s such a happy crew.

place card mice

happy mice crew

They survived a perilous journey across the couch – stay in a group little mice, stay in a group!

perilous mouse journey

And finally from Larissa – mmmcrafts –  slippers, mittens and snowballs  – I love it.

larissa holland mice

the somewhat weekly newsletter


Do you get my free weekly-ish newsletter? There are tips and tricks, ideas, stuff to try, all the latest news and blogposts and extra stuff, just for subscribers, delivered mostly on Friday. Pretty much.

handmade christmas

ann wood christmas tree

ann wood christmas tree

I had pretty much talked myself out of a Christmas Tree – one more thing to do- that sort of thing………  And then all of a sudden talked myself right back into it. I already had a tree so why not. Last year I got a living tree – a little Norfolk Pine – and it’s still here, a much more charlie brown sort of affair than it was when I got it last December but alive and pretty well. I’m so happy it survived – they often perish post Christmas and I’ve gotten very attached to it. I got it on a whim (down the street at a deli for 30 bucks) without knowing much about Norfolks; hot, dry, semi sunny New York apartments are not ideal environments for them. When it began to struggle last year I got a tip from a reader (thanks Sally!) to give it a cool shower once in a while and that did the trick. Decoration-wise I wanted to be gentle with it so I kept it simple – mostly things I made (pattern resources are listed at the bottom of the post) and a few heirloom treasures like my Mom’s pink glass beads.  It’s twinkly and festive and makes me happy.  I’m so glad I did it and I hope the tree doesn’t mind to much.

handmade boat ornament
fancy bird ornament
shooting star ornament

ornament pattern resources:

gather ye scraps – the forest folk pattern is here

forest folk pattern

forestfolk_pattern_lgget the pattern button

The forest folk pattern is in the shop. Little creatures that fit in the palm of your hand and are cozy in your pocket. I’m so excited to share this pattern with you – it is a satisfying project to make and, if you are inclined, a jumping off point for making all sorts of other creatures. The pattern has full instructions for a bunny and squirrel and with little modifications to the fabric colors and tail and ear patterns you could create skunks, beavers, gophers,chipmunks! raccoons….. you get the picture. I’d love to see what you make and you can send photos to ann at ann wood handmade dot com.

handmade forest friends

The squirrels and bunnies can be hand or machine sewn – I think hand sewing is best for beginners and it can be a nice travel project- I’m making lots for gifts this year – I pack up some cut pieces and sew them on the subway. The little bunny in the center is made from a worn cotton velvet that started its life with me as a skirt when I was in my twenties. About 15 years ago it became a pillow cover  and now it’s becoming a flock of little velvet bunnies because who doesn’t need a little velvet bunny? The velvet was more difficult than wool to sew but I couldn’t resist it.  (These creatures and some others are in the shop now if you  are not inclined to sew your own).

so long little bunny

so_long_bunnySo long little bunny!

forest folk sewing pattern

star folk sewing pattern

The star folk pattern is here!  Six pink cheeked little stars ( including grumpy and shooting) and a sleepy moon to sew. They are lovely as ornaments or a garland and make a devastatingly sweet mobile. Devastating.  It’s an easy pattern – nothing complicated and there are tons of photos to illustrate the steps if you are a beginner  and a resource list.

star folk sewing pattern

If you don’t see the mobile video below click here to check it out.  I love the way the different expressions and the movement work together.


star ornament

shooting star ornament

starfolk sewing pattern

I hope you make stars!

made by you

made from ann wood handmade craft patterns

I’ve put together a little collection of things made from my patterns – I love seeing these – beautiful work and tons of imagination. Thanks for sharing your photos!

A dear lamb by Evie Barrow.

evie barrow lamb

A fantastic boat by Alla  (this boat is made from my free boat pattern).

paper mache boat

The paper mache ships below are by Val – she used chalk paint – I love the pale, matte colors.

val's ships

An owl family! So many wonderful details – they are by Mama with a Needle and Thread.

handmade owl family

A magnificent paper mache ship by Kileen.

kileen paper mach ship Read More

pattern work : lambs

I ran into a snag with my lamb pattern, a major do over, so it won’t be out this week but when it is ready (hopefully next week-ish) it’s going to be pretty deluxe. There will be a basic standing lamb pattern as well as a collection with a couple other sleepy four legged creatures. I’m also working on a reclining lamb – it’s something I’ve been playing with for a long time and I think I’ve just about got it. I’m pretty excited about my progress – it’s been driving me crazy but it finally started to come together this week.

lambs

One of the biggest challenges for me in creating patterns is getting the shape that I want while keeping the templates as simple as possible.  I’m great at unnecessary complications and the lamb needed some rigorous editing. I also wasn’t happy with his butt – the result was just a little bit inconsistent  – my last draft fixed that and now the pattern produces a consistent, properly round, lamb butt result.

lambs

I also finished a wedding party last week: mr. and mrs. and ten little attendants.

diane_wedding_party

wedding partyAnd just the ladies.

It occurred to me while I was making this set that this is the 10 year anniversary of these little birds. I first started making them in 2005.  The original birds were made for a shop holiday window display – I wish I had pictures.  I can’t even begin to imagine how many of these little creatures I’m made over the last decade.