Tag: patterns

making a cardinal or other crested bird

cardinal sewing pattern

You’ll need the songbird sewing pattern and details below to make your cardinal.

cardinal sewing pattern

It’s surprisingly quick and easy to create a fabric crest for a cardinal or bluejay or tufted titmouse etc. etc.. The tutorial that follows was created for my songbird sewing pattern – but you could adjust the size to fit pretty much any bird pattern.

cardinal sewing pattern

We made cardinals in a workshop in Vermont.  It was a great weekend and the cardinals are awesome. Check out more about the workshop at the end of the post.

The Cardinal Modifications

songbird sewing pattern

You can find the songbird pattern here

– or use any bird pattern you like and adjust the template size.


download the crest template


how to sew a cardinal

1. Download and cut out the templates.  Cut the face cover and 3 crest pieces from fabric.

2. Place the face cover on your bird –  around the  beak – trim and adjust the size however you like – for this demonstration I left it full size.

3. Pin it in place – overlap the top corners to make it fit snuggly and stitch in place.

4. Pin the head cover in place and stitch around the edge.

5. Pinch the pointed end of the crest 1 piece.

6. Pin in to the top of the head and stitch around the edge.

7. At the back stitch the sides of the opening together – just at the base.

8. Pin the crest 2 piece the same way – on top of crest 1 and stitch around the edge.

9. Again stitching the edge together  – just at the base.

cardinal sewing pattern

10. Add the third crest piece. Optional – fray the edges or make a few stitches through the crest layers. Stitch simple eyes onto the face cover.

So easy! If you try making a crest I’d love to see! Use #annwoodpattern on instagram

A couple more workshop highlights – 2 students brought a pin girl for everybody!! I love them – find the free sewing pattern to make your own here.

pin girl sewing pattern

fabric cardinal workshop with ann wood

cardinal sewing pattern

cardinal sewing pattern


make a paper boat : a free tutorial

*This post contains an affiliate link

paper boat template image

Some projects are most satisfying to work on in batches. These paper boats are like that. They are quick and easy and you can make a bunch at once without much extra effort. Plus the finished group is very satisfying.  You probably already have most of the materials you need and you could easily be hanging a respectable fleet by the end of the day, who doesn’t want that?

download the boat template


you will also need:

  • heavy paper (I’m using water color paper) or light cardboard (like poster board)
  • a bamboo skewer
  • paper for the sail
  • elmer’s glue
  • gluestick
  • embroidery thread or light string (like baker’s twine)
  • buttons
  • paints, brushes  and/or collage materials
  • exacto knife
  • clothespins or paperclips for clamping

*Please read through all the steps before beginning.

*Also note I included some simple directions on the sail template for your convenience  but the directions below include more details and options.

1.  Cut out the boat and mast support templates and trace them onto light cardboard or a heavy weight paper. I’m Using water color paper (140 pound hot press is my favorite). Optional – paint both sides. I almost always paint a wash of water color on both sides of the boat and mast support.

2. Place the template back on the boat and poke your pencil through where the score lines intersect. Mark with a dot. Remove the template and draw on the score lines. Draw the score lines on the mast support too and mark an X on the center of the top section.

3. Use the back of an x-acto knife to score the lines on the boat and  mast support.

4. Gently fold the boat and mast support at the score lines.

5. Add glue to the last section of the mast support, fold it into a triangle and glue the top section over it.

6. Clamp with paper clip or clothespins while it dries.

make a paper boat

7. While your mast support dries paint or collage or draw on your boat. I did all three. I used a wash of watercolor, some pencil lines and a little collage. If you’re doing lots of collage I recommend using nori paste instead of blue stick . It is awesome. You can find it here. * FYI – this is an affiliate link – meaning I get a small commission if you purchase through the link.

8. Apply glue to the bow as indicated on the template.

9. Fold the boat together at the front and clamp with clothespins or paper clips while the glue dries.  Alternatively – you can skip the glue, bring the front sides together and stitch on the sewing machine close to the edge.

how to make a paper ship

10. Fold the center back ( A on the template) and apply glue to the top.

11. Bend up tab B – covering the top of tab A and matching the top edges. Apply glue and bend up tab C covering the top of tab B and matching the top edges. Clamp and let dry. Alternatively – skip the glue and attach the three layers with a stitch and a button (step 16 below).

easy paper boat project

Read More

how to make a doll house bed from clothespins – part one

doll house bed tutorial

make a doll house wood bed

Do you know somebody very little who needs a bed? A tiny rag doll perhaps? I’ve made you a tutorial for a sweet wooden dollhouse size bed made from clothespins and craft sticks. It is perhaps my greatest gift to humanity. Also, I had an unbelievably good time figuring it out and making it. So obsessed…

It is the latest Miss Thistle Society project, the quest to fully outfit the tiny rag doll’s world. Of course she needs a super cozy bed. The epic instructions for the bed are below and find the instructions for an easy tufted doll mattress here.

I hope you make sweet little beds! Tag your posts on instragram with #annwoodpattern and #missthistlesociety.

how to make a doll house bed from clothespins

note : It is very helpful to read through the directions completely before beginning.

doll bed from clothespins materials

*This post contains affiliate links – if you purchase supplies through some of these links The Miss Thistle Society gets a small commission.

Materials:

  • 6 clip clothespins and a few extra for clamping – I’m using these.
  • 11 jumbo craft sticks – The sticks are 6 inches by 3/4 inch – available in most craft stores or you can find them here.
  • small bamboo skewers – 1 or 2 depending on the length – I’m using these.
  • paint

Tools

  • wood glue
  • wax paper
  • scissors
  • wire cutter
  • ruler
  • exacto knife
  • paintbrushes
  • OPTIONAL – spackle, sandpaper

doll house bed diy - parts

Cut:

  • 8 – 3 and 3/4 inch craft sticks
  • 2 – 4 and 3/4 inch craft sticks
  • 2 – 4 and 1/2 inch bamboo skewers
  • 6 – split clip clothespins
  • And 1 whole craft stick

Separate the clothes pins by twisting. I used old but sturdy scissors to cut the craft sticks and wire cutters to snip the skewers.

cut parts for doll bed tutorial

Accurate measuring is very important to all of this fitting together.  And cut your craft sticks as straight as you can.

1. Make a mark on one side of 4 clothespin halves 1/8th inch from the notch on the flatside.

2. Apply wood glue to the end of one of the 3 and 3/4 inch craft stick pieces.

doll bed how to step 3

3

3. Working with wax paper underneath press the craft stick against the clothespin -as shown-  at the mark. The stick should be at a right angle to the clothespin.

doll bed diy

4

4. Repeat the previous step so you have two glued sets. Let these dry undisturbed on the wax paper until thoroughly set.

doll bed diy

5

5. Make 2 more sets and add a second stick to each. Add the second stick next to the first – closer to the tapered end of the clothespin. Let these dry as well. You should now have 4 glued sets of sticks and clothespin halves.

dollhouse bed tutorial

6.

6. You can use a ruler to check that your sticks are at a right angle to the clothespin.

7. When the glue is dry gently peel your pieces from the wax paper. Begin with the single stick pieces. They will be fragile so handle them gently. You will also need 2 more clothespin halves and one of your 4 and 1/2 inch skewers.

8. Flip one clothespin and stick set over so the flat side of the clothespin with the notch is facing you. Apply glue to one end of a the skewer.

Read More

star folk and crate and barrel ornaments

shooting star

I’m shooting pattern steps for some sweet little star folk – there are five stars with different expressions and a sleepy moon. They can be ornaments, a garland, a twinkly mobile or someone could be an adorable meteor shower for halloween.  It’s a quick and easy project – look for the pattern early next week.

starfolk ornaments

shooting star

And in other ornament news – I know it’s early – but in 2013 and 14 I tried to wait until what felt like a festive and civilized time to mention my Crate and Barrel ornaments and they were sold out before I told you about them.  So I’m not taking any chances. You can find the sleepy goats and lambs and baking mice online now and they should be in stores by the end of the month.  I’m pretty excited about them.

sleepy goat and lamb ornaments

baking mice ornaments

holiday survey results

grandma moses birds

grandma moses birds

Thank you so much to everyone who participated in the mini holiday ornament survey – I’m so glad I asked!

The questions were:

When should holiday patterns be available?

Is there a particular ornament you would like?

And do you prefer kits or downloads?

Regarding timing there were equally strong opinions for early and not too early. A lot of responders do not want to hear the word Christmas until October at the earliest but I was surprised at how many people answered July or June – about 1/3 of responders. That ship has sailed for this year ( I’m shooting for mid September) but I’ll keep it in mind going forward. If you are somebody that likes to start early there are three patterns from last year available – a little boat, a whale and a bird.

The overwhelming majority of responders would love to see woodland creatures and nature/ botanical inspired things. You’re forest people like me! I love it. There will be a woodland creature ornament pattern coming your way soon and for now the little mushroom pattern makes a great ornament. Just add a hanging string and I love using wool scraps for ornament fungi.

mushroom ornament

On the question of kits or downloads – downloads win by a landslide.  But you would like to see some hard to find or specialty materials available as an optional purchase – great idea! I’m on it.  If you’d like an email when new patterns or supplies are available you can join the mailing list here.

I also learned that I have incredibly kind readers. There was email after lovely email with marvelous ideas and insights and in addition to the survey responses personal notes that stunned me with their care and thoughtfulness.  Thank you – I appreciated every word.

sleepy august and a brief survey regarding the holidays

This August feels so thick and slow and sleepy, everything shimmers and that strange cicada sound – it all feels a little otherworldly to me. Even the creatures I’m making are golden and languid. August is also when I work on holiday designs.  I’m planning on some ornament patterns for the shop and I would love your opinion on a couple things. I posted a survey here – it’s super brief – just 3 questions and as a thank you you get a coupon for 30% off patterns   (the survey is closed).  I had fun with my handmade Christmas last year and you can check out that post if you’d like to get an early start – there are links to patterns and free projects and ideas. Also in the holiday department – I just saw samples of designs I made for Crate and Barrel this year and I can’t wait to show you – I’m so happy with them.

Have a lovely weekend – I’ll leave you with a couple sleepy Fortuny creatures.

sleeping  golden fox

fortuny owl louis

louis - fortuny owlLouis,  he got all dressed up for you in his summer best.

toadstool pattern progress

little mushroom sewing pattern

The toadstool pattern is just about done.  I’ve got a few steps to reshoot and then a little more work on the document and it’s ready to go. I’ve taught this class a couple of  times and that definitely helped in writing the steps.

toadstool pattern work

It took two years of experimenting to get the shape I wanted in my toadstools. Two years of almost there but not quite.  I am pathologically persistent – relentless. The most difficult part was finding a reasonably efficient way of making the concave shape for the underside, reasonably efficient and reproducible. I tried so many things – some with interesting results – like foam padded bra inserts – but it wasn’t exactly what I wanted.  What I ultimately came up with is simple and has a lot of flexibility – the shape and effect can be varied with little adjustments – it’s fun to play with.

squam toadstool workshop(photo by Andi Schrader)

I loved teaching the class – the steps seem odd until all of a sudden a toadstool appears. I hope one of the takeaways from my botanical experiment classes and this pattern is thinking innovatively about shape building and materials.

So stay tuned and if you would like to be notified by email when new patterns are released you can sign up here.

on my work table

paper mache ship

I love fabric.  I do – I think I’m genetically predisposed and I’m attracted to the possibilities. I use mostly found and salvaged things, garments, quilts etc. but I get pretty excited  about a good solid fabric store too. My favorites in New York are New York Elegant Fabrics on 40th St. and Purl in Soho. Purl is so pretty – I stopped by yesterday for supplies for two of the new patterns I’m working on.

purl_fabricsI could have spent the whole day there and I wish I had taken a couple photos – the shop is beautiful, they are truly masters of display – the place makes you want to make stuff and buy stuff.  I’m working on a lamb pattern  that will be out next week and something new – that’s what the metalics are for – I hope I can show you the prototype for that the end of next week.  And I’m building ships, I always build ships in the spring.

paper mache ship

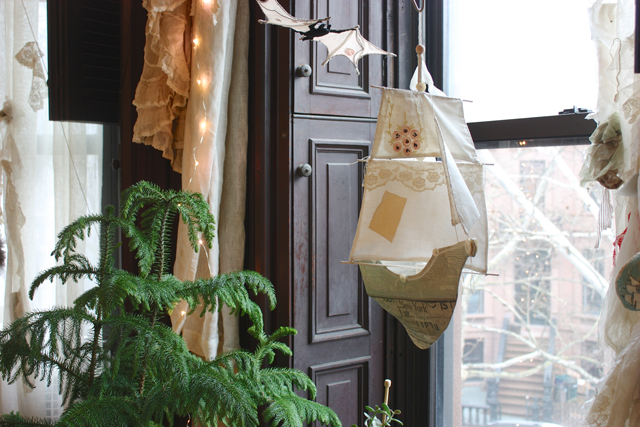
It’s a pearly grey day in Brooklyn – perfect for twinkle lights and twirling ships. This one is the large ship from the ship pattern collection – I modified the sides a bit – made it dip a little lower on the sides in the middle. You can get all kinds of interesting effects by playing with the side templates. I’m putting together a post of ships and boats made from the pattern- if you’d like to be included you can email photos to me at ann at ann wood handmade dot com.