Tag: soft sculpture

making a cardinal or other crested bird

cardinal sewing pattern

You’ll need the songbird sewing pattern and details below to make your cardinal.

cardinal sewing pattern

It’s surprisingly quick and easy to create a fabric crest for a cardinal or bluejay or tufted titmouse etc. etc.. The tutorial that follows was created for my songbird sewing pattern – but you could adjust the size to fit pretty much any bird pattern.

cardinal sewing pattern

We made cardinals in a workshop in Vermont.  It was a great weekend and the cardinals are awesome. Check out more about the workshop at the end of the post.

The Cardinal Modifications

songbird sewing pattern

You can find the songbird pattern here

– or use any bird pattern you like and adjust the template size.


download the crest template


how to sew a cardinal

1. Download and cut out the templates.  Cut the face cover and 3 crest pieces from fabric.

2. Place the face cover on your bird –  around the  beak – trim and adjust the size however you like – for this demonstration I left it full size.

3. Pin it in place – overlap the top corners to make it fit snuggly and stitch in place.

4. Pin the head cover in place and stitch around the edge.

5. Pinch the pointed end of the crest 1 piece.

6. Pin in to the top of the head and stitch around the edge.

7. At the back stitch the sides of the opening together – just at the base.

8. Pin the crest 2 piece the same way – on top of crest 1 and stitch around the edge.

9. Again stitching the edge together  – just at the base.

cardinal sewing pattern

10. Add the third crest piece. Optional – fray the edges or make a few stitches through the crest layers. Stitch simple eyes onto the face cover.

So easy! If you try making a crest I’d love to see! Use #annwoodpattern on instagram

A couple more workshop highlights – 2 students brought a pin girl for everybody!! I love them – find the free sewing pattern to make your own here.

pin girl sewing pattern

fabric cardinal workshop with ann wood

cardinal sewing pattern

cardinal sewing pattern


fabric markers, the best adhesive in the world and stitched botanicals

dot tipped fabric markers

stitched botanical experiments

Did you know fabric markers are a thing? I had no idea but happened upon a giant display of them in a big art supply store. They are fantastic and a perfect tool for the botanical classes I taught last week in LA.

dot tipped fabric markers

I’m always on the lookout for easy ways to make organic looking marks on fabric (there is a whole post about how to do that with bleach printing here). These markers are perfect. There were lots of different sizes and tips to choose from. My favorites were the brush and dot tips. I love a slightly imperfect dot.

fbric marker for lines on leaves

The olive marker is a beautiful translucent shade of green. Perfect for adding leaf details to fabric that was dyed olive green. So easy. And you can spritz with water to bleed and smudge and blend the colors. So many possibilities.

fabric markers and dye

*Some links below are affiliate links meaning I get a small commission if you purchase through the link.

If you’d like to try the markers: the brush tip marker is a Marvy Uchida Fabric Marker. The big dot tips are Tee Juice Fabric Markers and the thinner brush tips are Fabrico markers.

By the way I dip my green fabric twice. First in Olive green Dylon Dye (my favorite brand of dye- you can find it at Joann) and then in a light solution of orange dye (Dylon Goldfish is a great orange) to make it brighter, a more acid tone and a little variegated.

Check out a few of the marvelous botanical experiments from the workshop below.

botanical workshop images

While we are talking about supplies…

small jar of acid free paste

I’ll share my new favorite adhesive too. I love everything about Nori Paste. I even love the container. It’s great for collage, easy to work with, extremely smooth and the papers never wrinkle.

antique paper collage - beetle

Not even a little and I’m using very old, thin and fragile papers. I also tried it on a whispery thin bit of fabric for the bug wings thinking it would fail but the result was perfect. I painted a thin layer of paste to the paper and pressed the fabric into it. Get a10 oz. jar here.  It’s so good.    And fyi I get a tiny commission if you purchase through this link.

PS – Beetles are on my mind lately. So are ghostly ships and green birds and owls. Stay tuned and  have a lovely weekend – ann

strange specimens and bird work

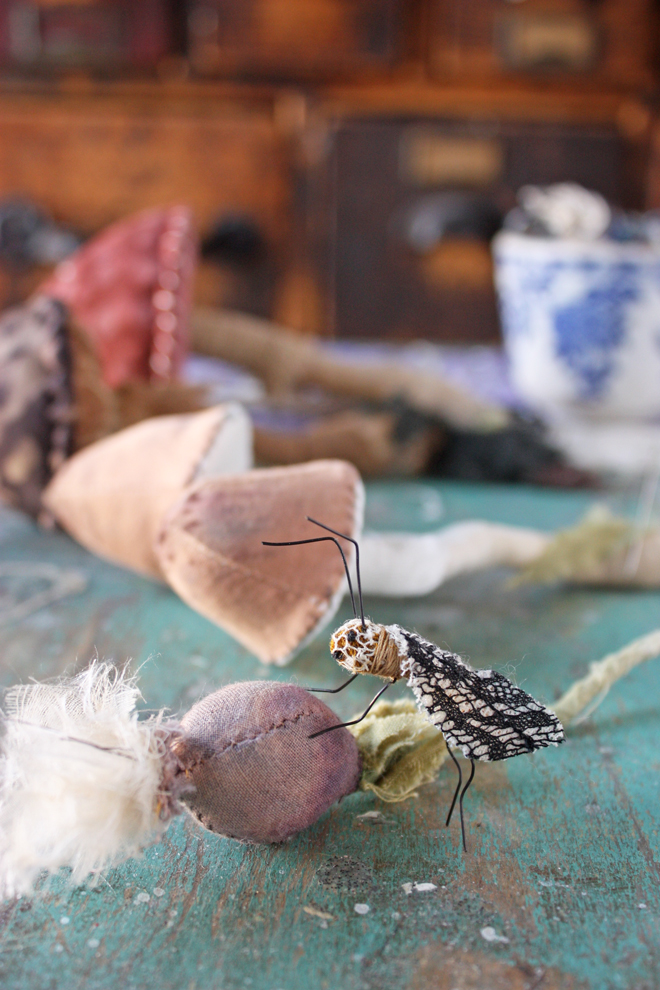
seedpod and lace fly

hand stitched mushrooms

Spongy and irregular. That’s what I’m looking for, in mushrooms anyway. Strange specimens, just yanked from the earth. I want you to smell the fungal forest air.

hand stitched mushrooms

little mushroom pattern.

hand stitched mushrooms

The fabric on the mushroom with the puffy and stripey undercap was made using the bleach printing method we talked about a few weeks ago. I did one thing differently this time and made the bleach marks with a paintbrush after sewing and before stuffing

get the mushroom sewing pattern

If you’d like to invent your own shapes and sewing patterns  good place to start with sculptural/ 3 dimensional sewing (like toadstools) is by experimenting with sewing spheres. Play with the edges, taper one end, experiment with the number of pattern pieces, cut them in half etc. and see what sorts of shapes you can create.

ann wood handmade sphere patterns

The free sphere template above will help  get you started. This mini seed pod is made from the 3 part sphere template (printed much smaller) and elongated a little at one end.

hand stitched botanical expeiments

seedpod and lace fly

Tiny fly inspected, tiny fly approved.

songbirds on my work table

sewing pattern for a textile songbird


I’m  working on songbirds too – made from antique garment scraps. The indigos are Japanese and the earth tones are mostly linings from edwardian dresses.

get the songbird sewing pattern

hand stitched songbird

What are you making? Have you tried the needle book or the tiny dishes? I’m putting together a post of things made from my patterns and tutorials. You can send photos to me at info at ann wood handmade dot com or tag your photos in instagram with #annwoodpattern.

the somewhat weekly newsletter

the dastardly owl sewing pattern is in the shop

a sewing pattern for a dastardly owl

a sewing pattern for a dastardly owl

Make this owl. This imperious and condescending owl. He measures 9 inches tall  from disgruntled talon to sinister horn. And the pattern scales well if you would like to try a larger owl.

The PDF pattern download is 31 pages long and has more than 130 color photos.  You’ll learn how to construct the basic body shape and talons as well as my system for creating owl-ish layers of feathers and a dastardly expression. Every element is broken down into steps and fully explained.

page form the ann wood handmade owl pattern

a gray soft sculpture owl

owl sewing pattern back feathers

owl sewing pattern : stuffing the legs

The pattern has all the top secret tricks I’ve come up with over 12 years of making ill tempered owls. And I’ll share this one with you here:

When the layers are fully assembled spritz with water or spray starch if you like.

smoothing owl feathers

And run a hot iron over the feathers. I do it to his face too (so rude) to adjust his dastardly expression. It has a magic effect, un-ruffling the feathers and giving the layers extra owly-ness.

I’m so excited to share this pattern with you! I’m so glad it’s done! I can’t believe how much work it was!And I hope you make owls!


owl sewing pattern - wool scrap owl

the somewhat weekly newsletter

Do you get my free weekly-ish newsletter? There are tips and tricks, ideas, stuff to try, all the latest news and blogposts and extra stuff, just for subscribers, delivered mostly on Friday. Pretty much.


dastardly owl laboratory and the silly bug club

owls on my work table

lots of hand sewn stuffed owls in progress

Update : find the owl sewing pattern here

The bodies are piling up as the owl shape is getting fine tuned. I’m preparing for owl workshops (PS – 2 spots have opened up in the 10/20-21 class) and ultimately a print and pdf owl pattern so every detail and dastardly proportion is being examined. I’ve started with the body shape. There are two construction methods I use for making owls, I created two patterns that produce slightly different shapes, one more rubenesque and another more sculptural and a bit more realistic. I might be the only one who can tell the difference. I tried to choose one to work on but ended up with a hybrid.


owls on my work table

The next step is to test and revise again and again until only what is essential is left, the shape is expressive, the pattern pieces assemble perfectly and any fussiness is removed. After each prototype I adjust and resew and if the adjustment is successful it is further refined in Adobe Illustrator.

stitched owl shape

I arrived at the body shape that feels just right yesterday. And the body pattern pieces feel good too, it snaps together like nobody’s business. Even with difficult fabric like this odd tweedy stuff from mrs. brown’s skirt. I’ve been making things from that turn of the century skirt for 8 years and I’m sorry it’s is almost gone now. It has made lots of wonderful owls and rats and spiders but the weave is loose, thick, ravely and a little slippery, super hard to sew.

hand stitched owl feathers

I’m ready to move on to the feathers, feet and features. As I finish my little pile of owly bodies I’ll experiment with those details until each is transformed into a teachable technique and or pattern piece that produces reliable results.

And the silly bug club! Thanks so much to everybody who showed up for the challenge. I drew a name from a hat and the winner of the mosquito rag doll is @bonniecapaulgallery ! I’ll message you on instagram for address etc. I hope you keep making and posting silly bugs, this was fun and I’ll offer you another challenge soon. Have a beautiful weekend and I’ll leave you with a few highlights from the posts and you can check out all the silly bugs here.

woodshedding birds and owls

hand stitched birds

hand stitched birds

I’m in the woodshed with songbirds. Evaluating the pattern and steps, testing and adjusting little things – using what I learned teaching the workshops last month to make the pattern all I want it to be.

pale blue textile bird

My friend Mickey introduced me to the term woodshedding and I love it:

“The ability to conjure up a feeling of wonder in others, to create a sense of awe, has always fascinated me. And while I do believe that magic can just “happen” under the right circumstances, creating magic is a much different story. It involves a lot of hard work, endless study and a constant refining of process and craft. In music, they call these periods of intense practice woodshedding, referring to the time spent honing skills privately out in the woodshed.”

Mick Riad  –  Creative Director, Fortuny

I think it is my favorite place to be, in the woodshed with something. Discovering, testing and refining. Deep in a learning process.

handstitched birds on my worktable

crimson and puce bird

hand stitched bird details

velvet fortuny owl

I’m also woodshedding owls to prepare for the dastardly owl workshops this fall (I think there are 2 spots left).

What’s going on in your woodshed?

Update – the songbird and owl patterns are available in the shop now:

a sewing pattern for a dastardly owl      sewing pattern for a textile songbird

fling your soul upon the gloom and something new in the bird leg department

carving a wax bird leg for casting in bronze

When I get whacked hard by life,  this is the poem I read.  And this is my favorite part:

An aged thrush, frail, gaunt, and small,
      In blast-beruffled plume,
Had chosen thus to fling his soul
      Upon the growing gloom.


It always cheers me up and I know what to do,  fling my soul hard at the gloom. It is the only thing to do.

I’m back from my teaching trip and It all worked out. But it sure was dicey for a while. There are so many reasons not to do stuff. Trying seems to invite bad luck. It doesn’t, but it seems that way.  The more stuff you do the more stuff there is that can go wrong. And when things do go wrong they love to go wrong in a horrifying cascade. That’s what happened in the 2 weeks before I left for Los Angeles. Lots of little things went wrong and a couple big ones.  There was plenty of gloom. I rarely feel defeated but I did for a while. The darkling thrush saved me.

carving a wax bird foot

I got home at 2 AM on Tuesday, watered the plants and spent the next 30 hours in bed. I am still exhausted. I’m also full of ideas. The first thing I did was ship a ton of  orders and then I carved a bird leg from a block of wax.

bird foot carved form a wax block

I’ve been wanting to try this for a long time.  The intention is to eventually have molds made and cast legs in brass and bronze and silver. I have no idea if I did this right. I just started hacking away at the wax  and did not look up for many hours.

carved wax bird foot

It was a deeply peaceful and immersive experience and I want to carve more wax – I have all sorts of ideas…

Sincerely,
The Aged Thrush

PS – I got the wax blocks here.

carving a wax bird leg for casting in bronze

mending, tiny pants, a blue owl, and other travel sewing

indigo owl work

Another thing to love about small sewing, hand sewing, is how well it travels. I’m packing up some projects today and heading out to water and forests and people who have forgotten what I look like.

indigo owl work

a sewing pattern for a dastardly owl

Find the owl sewing pattern here


This blue owl is coming. His indigo wings are all pinned up and ready for stitching. I love the blues, the variety, layered together Boro style.  There is also some small blue appliqué work – I’m experimenting with eyes.  More on that soon.


indigo owl wing

indigo owl progress

I’m bringing lot’s of mending too. The seats of my pants mostly. I’ve been wandering around  lately with extra and unseemly ventilation.

cornell and mending

cornell and mending

And  I’m spending some time with Joseph Cornell’s boxes and thinking about how things, objects, relate to each other, the moods and atmosphere and ideas those relationships can create and the poetry of things. They are ideas important to upcoming workshops.

tiny tousers

free doll pants sewing pattern


And I want to sit by the water and make tiny trousers. Tiny trousers for little lamb gentlemen.

I find the little pants particularly satisfying – they are quick and there is just something about tiny pants.

lamb folk progress

I want to come home with a little pile of satchels and pants.

improvisational doll making – part 1

improvisational doll making

Its good to experiment – but not easy to let yourself,  there is a powerful force that wants you to stay on the well lit path.  Experimenting generates ideas and makes you ask new questions. It can shift your perspective, reveal connections and intersections.  And maybe most importantly true experimentation helps you work with uncertainty and build a tolerance for trying stuff that might not work. There is no creativity without failure.

One way to make yourself experiment is to create conditions that force you to improvise. I’m going to show you one of the techniques I use.  I’m making dolls – from the inside out. It’s a method that is imprecise and difficult to control – in a good way – there is lots of opportunity for happy accidents. It’s a spontaneous process – each action builds on the previous – you work with what shows up.
If you would like to try you will need:

  • cotton batting
  • wire
  • basic hand sewing tools
  • fabric, lace and trim scraps
  • a glue stick

* you can click on any of the images for a larger view

wire doll forms

I start by making a simple wire form for the torso and head – I made three.  Next  cut strips of cotton batting and begin to build a shape by winding it around the wire form.  A little bit of glue stick will help when adding or ending a strip.

Keep winding until you are happy with the shape – you can also add bits of batting in some areas for rounder shapes – like in the center image above – I’ve given her a substantial bosom by adding a scrap of folded batting and winding over it. I stitch through the shape here and there to adjust it and help it all stay together and finally I cut pieces of batting to stitch over the shape.

Next I begin to add fabric – I’m using a very light cotton to cover her face and the front of her chest. I pull the fabric around – stitch it in place and trim away the extra.

I covered the edge of the face fabric with strips of cotton for hair – I’ll come back to that later – I want to make the top of her dress first.  Also – you may notice another doll has appeared – I’ll be working on her as well.

Her face and chest  are covered in a light ivory silk, I used black cotton for her hair and stitched super simple features. Now I’m adding a scrap of lace because it’s lovely and will also cover some edges and seams I’d like to conceal.  Read More

bats and perseverance

bat work

bat work

I have been bothered by bats for a very long time.  They were one of my first stitched creatures. I love them but vowed to never make another.  The process was brutal on my hands and had a high late stage failure rate.  And they took an outrageous amount of time.  But I love them, I love their shape, their curves and the way that shape seems to change as they twirl in the breeze and the lovely shadows they cast.

stitched bat

So lately I started from scratch – a whole new method of constructing them.  There have been several dismal failures but in the past week I’ve landed on something good -. It’s much easier hand-wise and the result is reliable and consistent.  It still takes forever. Not as bad as the original bats but still problematic.  I’m not sure I can get to a place where I can produce them with any efficiency but I’m not done trying.

stitched bat

edwardian bat

botanical experiments and 11 years of blogging

stitched seedpod experiment

white rotary

A blog anniversary snuck past in February – 11 years.  When I did remember I thought maybe I didn’t really have anything to say about it.  But the comments about the machine on last week’s post changed my mind.  I remembered what a part of everything the machine has been.  I remembered the serendipity,  the sweetness and steadiness of it’s presence in my life and work.

It has been with me for all of it.  My mother’s machine.  I have sewn on it my entire life.  So I want to mark this anniversary with an entirely true and slightly spooky story about it.  It happened in the very beginning of this blog – 11 years ago:

In December of 2006 I had just begun my solo enterprise – I had lots of orders and deadlines and on the eve of one of those very important deadlines I was still sewing furiously very late at night. With a long way still to go the machine suddenly stopped and a chunk of metal rocketed past my face. I found it across the room – an essential part of the machine – no sewing without it – and it was broken. I tried to fix it but nothing worked. I have a drawer full of bits and pieces that I saved from my Father’s workshop – bits of metal and rubber, knobs, washers, gears, springs etc. I thought maybe I could cobble some temporary solution together from those. Another hour of frustration and no luck at all. Exhausted, defeated and ready to give up I pushed the drawer closed and it stuck halfway, I pushed again and it stuck again, I pulled and it stuck. I gave a great big angry pull and the drawer flew out and what had caused it to stick also flew out and landed  – right   in    my    lap.  To my amazement and disbelief it was a replacement for the broken sewing machine part – the exact part – identical but for the color. Not similar, not “good enough” the EXACT PART in perfect condition. I snapped it in and it worked beautifully, that night and all the nights and days that have followed.

The End.

botanical experiment

And – a little bit of what I’m working on today. New botanical experiments.  I think the one above will be a pink cloaked bishop lily and below a seedpod experiment – playing with the idea of honeycomb texture. I’ve got plans for more and I’ll show you next week.  I’m also planning on a shop update next week  (postponed for a bit) with botanicals and some creatures. You can sign up here to be notified by email when new items are available.

stitched seedpod experiment

please meet vivienne and work on a new rag doll experiment

Entirely nude, but for a threadbare whisper of a nightgown.

vivienne : naked ragdoll

The gown is made from the sleeve of an Edwardian lawn gown – so simple to make. I just hemmed the top edge – gathered across the front side and added ribbon ties that go around her neck – halter style.

vivienne : an immodest doll

She sits serenely,  in her nightgown,  silently judging that little ant who admires himself so constantly.

ant and ragdoll

Update 1/6/2019 : There is a nude rag doll pattern and kit in the works – you can sign up here if you’d like an email when it is available.

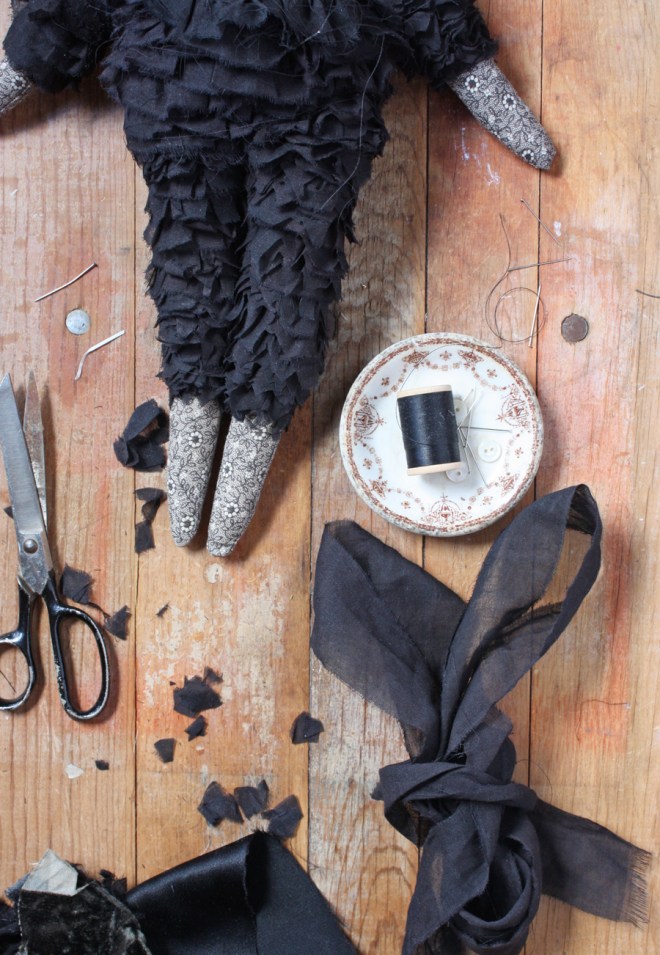
And something new on my worktable – an evolving rag doll creature. The texture thing is pretty ambitious and I’m not sure I’ll ever do it again,  it’s labor intensive even by my standards.  But I do like the effect on him.

ragdoll experiment